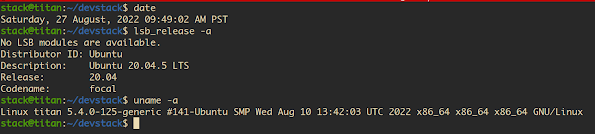
I need a small IaaS cloud infra for my CMSC291: Modern Distributed Systems class this semester so I decided to set up an OpenStack instance on one of SRG's servers running Ubuntu 20.04. I have used OpenStack in the past so I'm quite comfortable using it.
What is DevStack?
"DevStack is a series of extensible scripts used to quickly bring up a complete OpenStack environment based on the latest versions of everything from git master. It is used interactively as a development environment and as the basis for much of the OpenStack project’s functional testing."
- https://docs.openstack.org/devstack/latest/
[1] I thought the process will be straightforward but unfortunately minor tweaks were needed. Below is the configuration of the host.
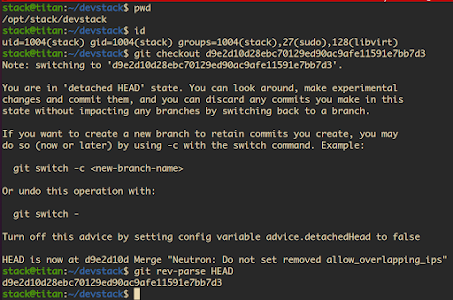
[2] This is the commit hash that worked for me, make sure to checkout this particular commit : d9e2d10d28ebc70129ed90ac9afe11591e7bb7d3
[3] Get the IP address of the host (using ifconfig) and export it as HOST_IP environment variable. Let's say the IP address is 192.168.3.100.
[5] Edit lib/neutron_plugins/ovn_agent.
[6] Unstack and Clean.
$sudo /usr/share/openvswitch/scripts/ovs-ctl restart

[8] Stack. This may take a while so grab a cup of coffee.

[9] Launch an instance.

[10] TODO: Configure Floating IP addresses and add glance images.


0 comments:
Post a Comment